
Table of Contents
Introduction
What is Sandwich Bread?
Sandwich bread is soft, fluffy, and versatile, perfect for making sandwiches, toast, or even French toast. Known for its mild flavor and tender crumb, it is designed to complement a wide range of fillings and spreads. Unlike artisan or rustic bread, sandwich bread typically has a uniform structure, making it easy to slice and ideal for everyday use.
Why Make It Without a Loaf Pan?
Not everyone has a loaf pan, but that shouldn’t stop you from baking delicious sandwich bread at home! Making bread without a loaf pan is also a great way to explore different shapes and techniques. For instance, shaping the dough into a free-form loaf or braid can add a rustic charm to your bread while maintaining its softness and usability for sandwiches. It’s an excellent way to get creative and break free from traditional methods.
Benefits of Making Bread at Home
Health Benefits
Homemade bread offers a healthier alternative to store-bought options. By making it yourself, you control the ingredients, avoiding unnecessary preservatives, additives, and excessive sugars or salts often found in commercial bread. For added nutrition, you can also choose high-quality flours, natural sweeteners, and healthy add-ins like seeds, nuts, or whole grains.
Cost-Effectiveness
Baking bread at home is budget-friendly. The essential ingredients—flour, water, yeast, and salt—are inexpensive and often already in your pantry. Compared to the cost of purchasing premium or artisan bread, homemade bread saves money in the long run, especially for families or frequent bread eaters.
Customization Options
One of the best parts of making bread at home is the ability to customize it to your taste and dietary needs. You can experiment with different flours, flavors, and textures, such as adding herbs, spices, cheese, or dried fruits. It’s also easy to adapt recipes for dietary preferences, like gluten-free or vegan options, ensuring every loaf is suited to your lifestyle.
Key Ingredients for Sandwich Bread
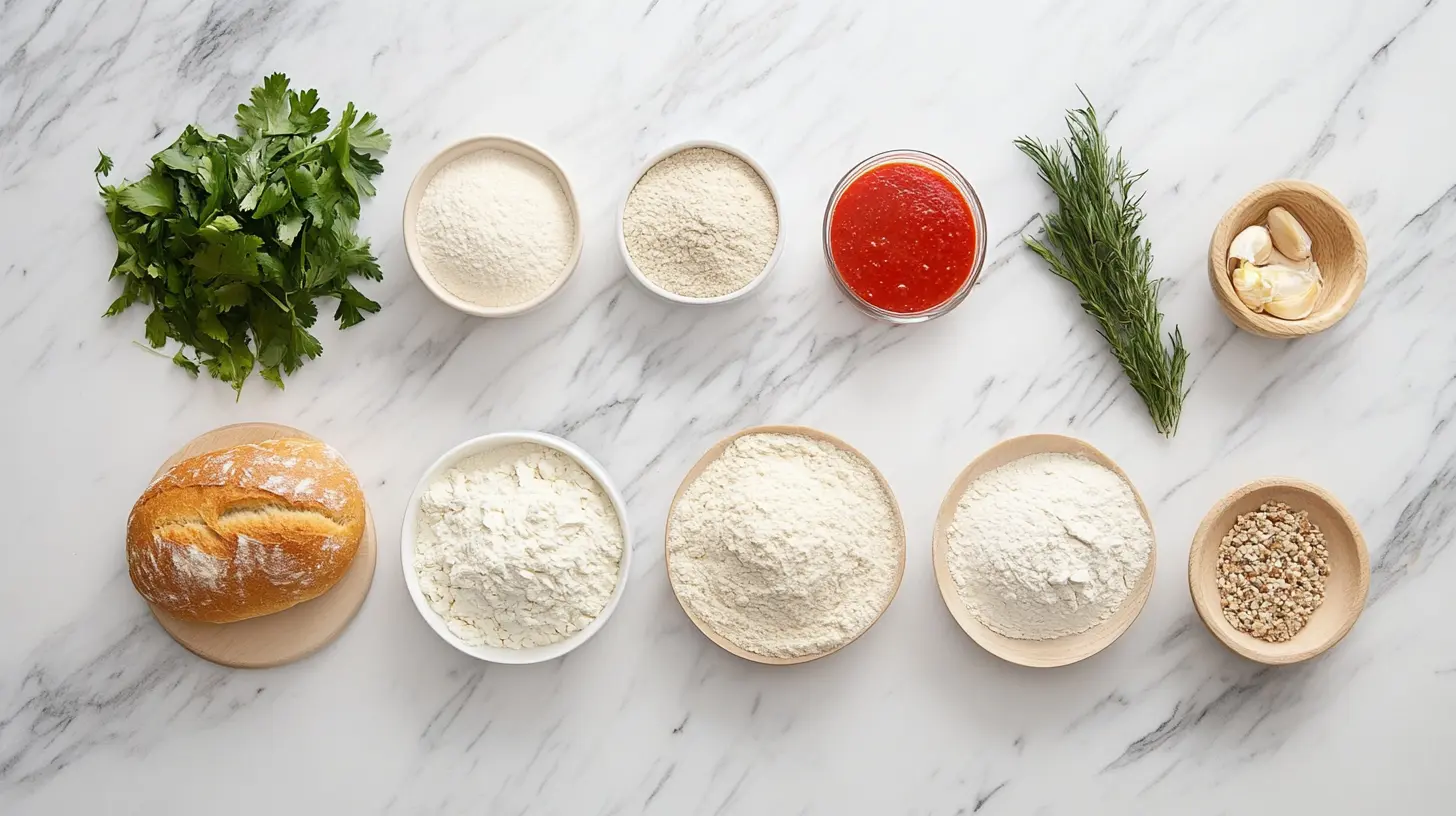
Essential Ingredients
- Flour
Flour is the backbone of any bread recipe, providing structure and texture. All-purpose flour or bread flour works best for sandwich bread due to its higher protein content, which helps create a soft yet sturdy loaf.
- Water or Milk
Liquid hydrates the flour and activates the yeast. Milk can add richness and tenderness to the bread, while water keeps it lighter and leaner.
- Yeast
Yeast is the leavening agent that helps the bread rise. Active dry yeast or instant yeast is commonly used for sandwich bread.
- Sugar
Sugar adds a touch of sweetness to balance flavors and provides food for the yeast, enhancing fermentation and browning.
- Salt
Essential for flavor, salt also strengthens the gluten structure, ensuring the bread holds its shape during baking.
- Fat
Ingredients like butter, oil, or shortening soften and moisten the bread, improving its shelf life and texture.
Combine the activated yeast with flour, salt, and butter. Knead the dough for 8-10 minutes until it’s smooth and elastic. Need tips on mastering your dough? Our guide on French Bread Recipes covers valuable techniques.
Optional Add-Ins for Flavor Variations
- Herbs and Spices
Add dried herbs like rosemary or thyme or spices such as garlic powder for a savory twist.
- Seeds and Nuts
Incorporate sesame seeds, sunflower seeds, or chopped nuts for added crunch and nutrition.
- Cheese
Fold in shredded cheese for a rich, savory loaf that pairs wonderfully with soups or sandwiches.
- Sweet Additions
Mix in raisins, dried cranberries, or a swirl of cinnamon sugar for a slightly sweet bread perfect for breakfast.
- Whole Grains
Substitute a portion of the white flour with whole wheat, rye, or oat flour to enhance nutrition and flavor.
Tools You Need
Common Kitchen Tools for Bread-Making
- Mixing Bowls
A set of large mixing bowls is essential for combining and kneading the dough.
- Measuring Cups and Spoons
Accurate measurements are crucial for consistent results in bread-making.
- Wooden Spoon or Dough Scraper
A sturdy spoon or dough scraper helps mix and handle the dough without sticking.
- Rolling Pin (Optional)
It helps shape certain dough types or flatten air bubbles during preparation.
- Kitchen Scale
This is for precision, especially when working with weight measurement recipes.
- Bench Scraper
It is ideal for dividing dough and keeping your workspace tidy.
- Clean Kitchen Towel or Plastic Wrap
These are used to cover the dough during proofing to retain moisture.
- Oven Thermometer
Ensures your oven reaches and maintains the correct temperature for baking bread.
- Baking Sheet or Pizza Stone
It is a versatile alternative for baking bread, especially when not using a loaf pan.
Substituting for a Loaf Pan
- Free-Form Loaf
Shape the dough into a round or oblong loaf and bake it directly on a baking sheet or pizza stone.
- Casserole Dish or Cake Pan
Use a heatproof dish with high sides to mimic the structure of a loaf pan. If necessary, line it with parchment paper.
- Dutch Oven
Perfect for creating a steamy environment, resulting in a soft interior and crisp crust.
- Foil Pan or DIY Mold
Make your loaf pan using heavy-duty aluminum foil molded around a box or rectangular object.
Preparing Your Workspace
Cleaning and Organizing
- Clear the Countertop
Start by clearing your workspace of clutter. Bread-making requires enough space to knead, shape, and rest the dough comfortably.
- Sanitize Surfaces
Wipe down your countertop and tools with a clean, damp cloth or a food-safe sanitizer to ensure a hygienic environment for handling dough.
- Gather Ingredients and Tools
Arrange all your ingredients and necessary tools within easy reach. Pre-measuring ingredients before starting can streamline the process and prevent mistakes.
- Use a Non-Stick Surface
Dust your countertop or use a silicone baking mat to prevent the dough from sticking during kneading and shaping.
Ideal Environment for Bread-Making
- Warm Temperature
Bread dough rises best in a warm, draft-free environment. Aim for a room temperature of 75–80°F (24–27°C). If your kitchen is cold, you can proof the dough in an oven turned off with the light on or near a warm appliance.
- Low Humidity
Excess moisture in the air can affect the dough’s texture. If it’s a particularly humid day, consider using slightly less liquid in the recipe to maintain the dough’s consistency.
- Adequate Lighting
Good lighting helps you assess the dough’s texture, ensure even kneading, and monitor proofing progress.
- Organized Workflow
Keep a clean towel or scraper nearby to clean flour or dough residue as you work quickly. A bin or bowl for scraps or used utensils minimizes mess and interruptions.
Step-by-Step Recipe for Sandwich Bread

Mixing the Dough
- Combine Dry Ingredients
Whisk together the flour, sugar, salt, and yeast in a large mixing bowl.
- Add Wet Ingredients
Add warm water or milk (100–110°F) and melted butter or oil. Mix with a wooden spoon or your hands until a shaggy dough forms.
- Hydration Check
If the dough feels too dry, add a tablespoon of water at a time. If it is too sticky, sprinkle in a bit more flour.
Kneading Techniques
- Hand Kneading
Transfer the dough to a lightly floured surface. Push the dough with the heel of your hand, fold it over, and rotate it. Repeat for 8–10 minutes until the dough is smooth and elastic.
- Stand Mixer Method
Use a dough hook attachment and knead on medium speed for 6–8 minutes until the dough pulls away from the sides of the bowl and becomes elastic.
- Windowpane Test
Stretch a small piece of dough. If it forms a thin, translucent layer without tearing, it’s ready.
First Proofing
- Prepare for Proofing
Place the dough in a greased bowl, turning it to coat all sides. Cover with a clean kitchen towel or plastic wrap.
- Optimal Environment
Let the dough rise in a warm, draft-free area for 1–2 hours or until it has doubled.
- Check Readiness
Gently press a finger into the dough. If the indentation springs back slowly, it’s appropriately proofed.
Shaping the Dough Without a Loaf Pan
Techniques for Shaping
- Free-Form Loaf
Shape the dough into an oblong or round loaf. Gently tuck the edges underneath to create a smooth surface.
- Braid or Roll
Divide the dough into portions and braid or roll them into individual shapes for a creative touch.
Common Alternatives to a Loaf Shape
- Boule (Round Loaf)
A classic, rustic round shape perfect for baking on a sheet or stone.
- Batard (Oval Loaf)
A slightly elongated shape resembling a more miniature baguette.
- Braided Loaf
Perfect for a decorative touch, especially with sweet or savory additions.
Choosing a Baking Surface
Baking Sheet Method
- Line a baking sheet with parchment paper or lightly grease it. Place the shaped dough on the sheet, leaving enough room for expansion.
Using a Cake Pan or Casserole Dish
- Grease the pan or line it with parchment paper. The high sides mimic a loaf pan, helping the dough maintain its shape as it rises and bakes.
Final Proofing Tips
How to Ensure Proper Rise
- Monitor Timing
Allow 30–60 minutes for the final proofing. The dough should double in size but still hold its shape.
- Finger Dent Test
Press a finger lightly into the dough. If the indentation springs back slowly, it’s ready to bake.
Preventing Over-Proofing
- Watch for Signs
Over-proofed dough may become too puffy and collapse. Monitor closely during the final rise.
- Timing Adjustments
In warmer environments, proofing time may be shorter. Check the dough frequently to avoid over-proofing.
Baking the Bread
Optimal Oven Temperature
- Preheating the Oven
Preheat your oven to 375°F (190°C) for even baking. A well-preheated oven ensures proper rise and a golden crust.
- Steam for Crust (Optional)
For a slightly crispier crust, place a pan of hot water on the bottom rack of the oven during preheating to create steam.
Time Management and Checking for Doneness
- Baking Time
Bake the bread for 25–35 minutes, depending on its size and shape. Smaller, free-form loaves may require less time, while larger ones might need more.
- Color as a Guide
The bread is ready when the crust turns a deep golden brown.
- Hollow Sound Test
Tap the bottom of the loaf gently. If it sounds hollow, the bread is fully baked.
- Internal Temperature
Use a kitchen thermometer for accuracy. The bread should register between 190°F and 200°F (88–93°C) in the center.
- Cooling
Let the bread cool on a wire rack for at least 30 minutes before slicing. This allows the crumb to set correctly and prevents it from becoming gummy.
Cooling and Storing Homemade Bread
Proper Cooling Techniques
- Remove from the Baking Surface
After baking, transfer the bread immediately to a wire rack to prevent condensation from forming on the bottom, which can make it soggy.
- Allow Full Cooling
Let the bread cool completely, usually 1–2 hours, before slicing. Cutting into hot bread can cause the crumb to become gummy and lose its structure.
Storage for Freshness
- Room Temperature Storage
- Wrap the bread in a clean kitchen towel or place it in a paper bag to maintain a soft crust while allowing some airflow.
- Store at room temperature for up to 3 days in a cool, dry place. Avoid plastic bags, which can trap moisture and cause sogginess or mold.
- Use a Bread Box
If available, a bread box offers the perfect balance of ventilation and humidity to keep the bread fresh longer.
Freezing Tips
- Slice Before Freezing
Pre-slice the bread for convenience. This way, you can thaw only the number of slices you need without defrosting the entire loaf.
- Wrap Properly
To prevent freezer burn, wrap the bread or slices tightly in plastic wrap or aluminum foil. For extra protection, place the wrapped bread in a resealable freezer bag.
- Freezing Duration
Homemade bread can be frozen for up to 3 months. Label the package with the date for reference.
- Thawing and Reheating
- To thaw, leave the bread at room temperature for a few hours.
- For a freshly baked taste, reheat slices in a toaster or the whole loaf in the oven at 350°F (175°C) for 10–15 minutes.
For more bread ideas, explore how different textures are achieved in our “What is French Bread Made Of?” article.
Tips for Enhancing Flavor and Texture
Adding Herbs or Seeds
- Incorporate Herbs and Spices
- Add fresh or dried herbs like rosemary, thyme, oregano, or basil for a savory twist.
- Spices like garlic powder, onion powder, or paprika can add depth to your bread’s flavor.
- Mix in Seeds
- Sprinkle seeds such as sesame, sunflower, flax, or chia into the dough or on top before baking for added texture and nutrition.
- To help the seeds stick, brush the dough lightly with water, milk, or an egg wash before sprinkling them on top.
- Create a Seed Crust
- Roll the shaped dough in a mix of seeds to create a flavorful and crunchy crust.
Adjusting Hydration for Softer Bread
- Increase Liquid Content
- Increasing the water or milk in the recipe can create a more hydrated dough, resulting in softer, more tender bread. Start with a minor adjustment, such as an extra tablespoon of liquid.
- Use Milk or Buttermilk
- Substituting water with milk or buttermilk adds richness and enhances the soft texture of the crumb.
- Add Fat
- Add ingredients like butter, olive oil, or yogurt to improve moisture retention and softness.
- Longer Kneading Time
- Proper kneading develops the gluten structure, making the bread more elastic and airy.
- Steam During Baking
- Create a steamy environment by placing a pan of hot water in the oven. This helps the bread rise better and develop a softer crust.
Storing and Serving Your Bread
Homemade sandwich bread can be stored in an airtight container for up to a week. Pair it with hearty dishes like Chicken Casserole or elevate a classic breakfast recipe like Breakfast Pizza.

FAQs
What Can I Use if I Don’t Have a Loaf Pan for Bread?
If you don’t have a loaf pan, you can shape the dough into a free-form loaf, such as a boule (round) or batard (oval), and bake it on a baking sheet. Other options include using a cake pan, casserole dish, or a Dutch oven for support and structure during baking.
Can I Bake Sandwich Bread Without a Loaf Pan?
Yes, you can bake sandwich bread without a loaf pan! Shape the dough into a rectangular or oval loaf and bake it on a baking sheet. Alternatively, use a casserole dish or cake pan to mimic the structure of a loaf pan. These methods still yield soft and delicious sandwich bread.
What Size Pan Can I Substitute for a Loaf Pan?
A standard loaf pan is typically 8.5 x 4.5 inches or 9 x 5 inches. If you don’t have one, you can use:
- An 8-inch or 9-inch round cake pan
- A square baking dish (8 x 8 inches)
- A small casserole dish (approximately 2 quarts in size)
- Adjust baking times slightly depending on the pan’s depth and size.
Can I Make a Loaf Pan with Foil?
Yes, you can create a makeshift loaf pan using heavy-duty aluminum foil:
- Fold layers of foil to create a sturdy base and walls.
- Shape it around an existing loaf pan or another rectangular object to achieve the correct size and structure.
- Ensure the edges are folded firmly and reinforced for stability.
- Place the foil mold on a sturdy baking sheet for support.
Conclusion
Baking sandwich bread at home is a rewarding experience that combines creativity, skill, and the joy of crafting something delicious from scratch. Whether you have a loaf pan or not, this guide shows that you can achieve a perfectly soft and versatile bread that suits your needs with a few simple tools and techniques. From understanding essential ingredients to exploring alternative shapes and baking surfaces, homemade bread offers endless possibilities for customization and flavor enhancement.
Making sandwich bread at home is easier than you might think, and the rewards are unmatched in taste and texture. Whether crafting an artisan sandwich or enjoying a slice with butter, this bread is a versatile kitchen staple. For more culinary inspiration, don’t miss our recipe collections, like the one on Taco Dips.
Happy baking! 🥖