Welcome to Quicky Cook Recipes, where every dish comes with a story, and today’s is all about a Rice krispie treat recipe that’s as timeless as it is tasty. I’m Sophia Brooks, the heart and hands behind this kitchen-loving corner of the web, and I’m beyond excited to share this nostalgic favorite with you.
Let me take you back for a moment…
It was a rainy Saturday afternoon in my small Midwestern hometown. The kind of day where your soul craves warmth and comfort, and for me, that always came from the kitchen. My mom had this tattered old recipe card that said simply: “Marshmallow Squares.” In smudged handwriting, most likely from one of my buttery fingers as a kid, it had three ingredients: marshmallows, butter, and rice cereal. That was the first Rice krispie treat recipe I ever made. And honestly? I’ve never stopped.
The Heart Behind Quicky Cook Recipes
I started Quicky Cook Recipes with one mission: to show that delicious, homemade meals don’t have to take hours or a pantry full of gourmet ingredients. As a busy mom, food-lover, and everyday cook, I know how overwhelming it can be to plan meals when life is already chaotic. But I also know how healing a warm, gooey dessert can be after a long day. That’s why this blog is packed with the recipes I love, simple, wholesome, and always fast.
This treat, in particular, holds a special place in my heart. It was the first dessert I made all by myself, standing on a step stool next to my grandmother. She let me stir the marshmallows while she added the cereal. The way she smiled and nodded when I got it “just right”? Unforgettable.
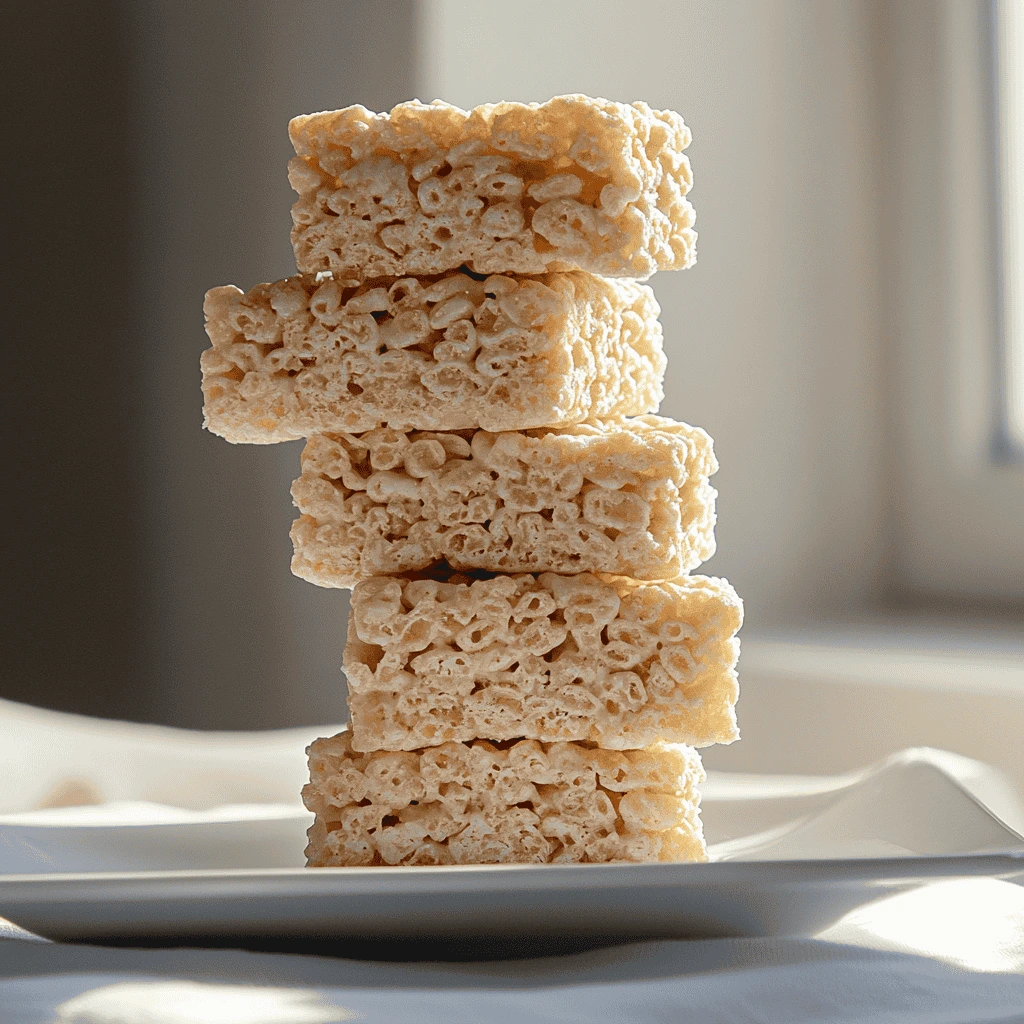
Table of Contents
Table of Contents
The Classic Rice Krispie Treat Recipe (with Ingredient Table)
Let’s begin with the base, the classic Rice krispie treat recipe that’s been passed down and loved for generations. This is your go-to formula, and once you master it, the variations are endless.
✅ Tip: Fresh marshmallows melt smoother and taste better. Always check the expiration date!
Rice Krispie Treat Recipe – The Ultimate Classic Dessert Guide
Equipment
- 9×13-inch Baking Pan
- Parchment Paper
- Large pot
- Silicone Spatula
- Flat Spatula
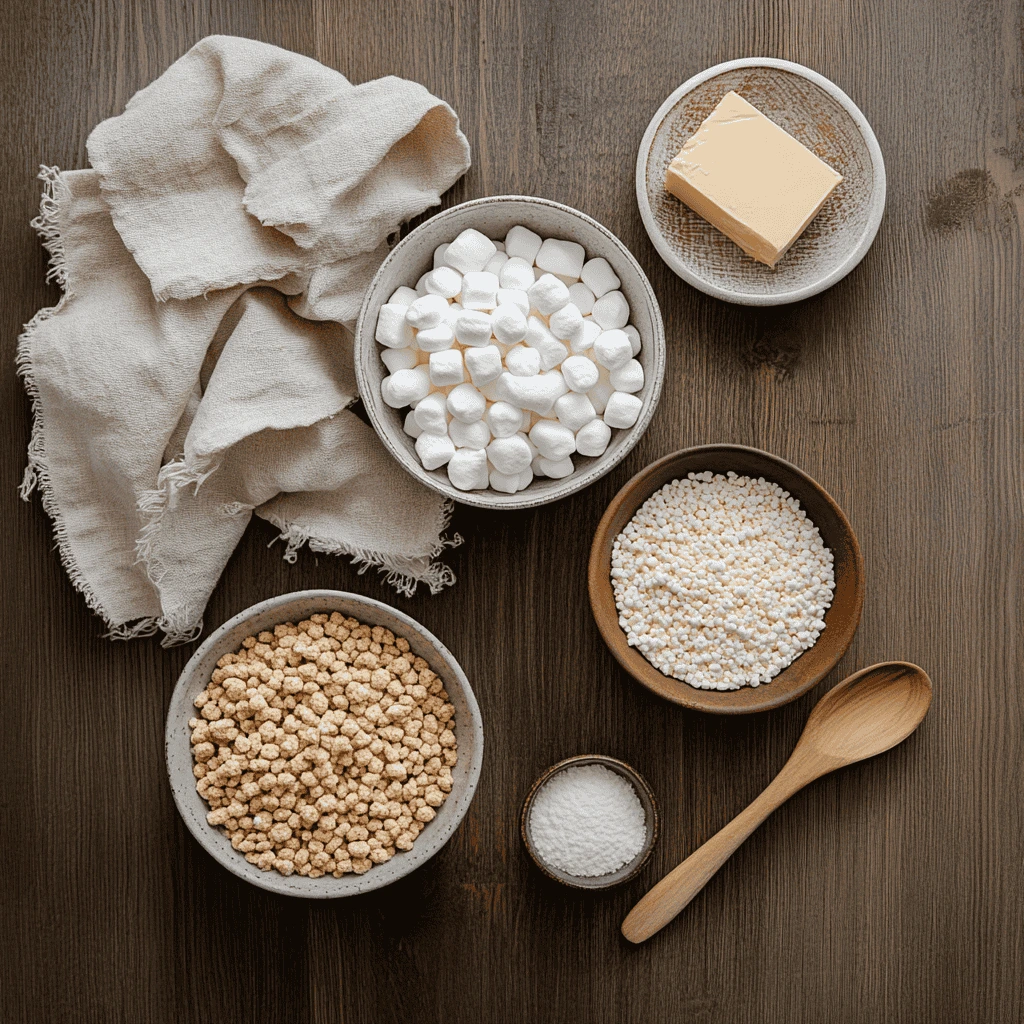
Ingredients
Main Mixture
- 3/4 cup unsalted butter 170g; 12 Tbsp
- 20 oz mini marshmallows two 10-ounce bags; 566g; 11 heaping cups
- 1/2 tsp pure vanilla extract
- 1/8 tsp salt just under 1/8 teaspoon
- 9 cups crispy rice cereal 270g
Instructions
- Line a 9×13-inch baking pan with parchment paper and lightly grease it. Set aside.
- Melt the butter in a very large pot over medium heat. Add the marshmallows and stir until fully melted.
- Remove from heat and stir in vanilla extract and salt. Fold in crispy rice cereal until evenly coated.
- Transfer mixture to prepared pan. Spread gently with a silicone spatula and lightly press with a greased flat spatula.
- Let set at room temperature for at least 1 hour or up to 1 day. Cover tightly if storing longer.
- Lift from pan using parchment edges and cut into squares. Store leftovers in an airtight container up to 3 days.
Notes
Step-by-Step Instructions
- Start by gently melting the butter in a large pot over low heat. Slow and steady gives you that rich, smooth base. Take your time here; the slower it melts, the more flavor you’ll draw out.
- Add the mini marshmallows and stir constantly until fully melted and silky smooth.
- Remove the pot from the heat and stir in vanilla extract and a pinch of sea salt, if using.
- Add the Rice Krispies cereal and gently fold it in. Work quickly but avoid crushing the cereal.
- Scoop the gooey mixture into a greased 9×13-inch pan, then gently press it down using wax paper or a greased spatula, just enough to even it out without squishing the fluff.
- Let it cool for at least 1 hour at room temperature before slicing into squares.
Secret Tricks for the Perfect Texture
The texture is what makes this treat iconic. You want it to be chewy, not hard. Soft, but not soggy. Here’s how to make sure yours are just right.
Avoiding Hard Rice Krispie Treats
- Keep the heat low while melting the marshmallows. High heat leads to stiff, dry treats.
- Use fresh ingredients, especially marshmallows. Older marshmallows won’t melt evenly.
- Don’t over-press the mixture into the pan. Light pressure keeps them fluffy and chewy.
Make Them Extra Gooey and Chewy
- Right after mixing in the cereal, toss in a handful of whole marshmallows. Stir them through, then pour everything into the pan. Those little unmelted pockets turn into extra-gooey surprises in every bite.
- Add 1 to 2 tablespoons of corn syrup or sweetened condensed milk for enhanced chewiness and moisture retention.
- Sprinkle a few mini marshmallows on top before pressing to create a soft, pillowy top layer.
Creative Variations to Try
Once you’ve nailed the classic recipe, it’s time to play. You can flavor, color, and shape these treats to suit any mood, holiday, or party theme.
Flavor Variations
- Peanut Butter Swirl: Add ¼ cup creamy peanut butter to the marshmallows as they melt.
- Chocolate Chip: Stir in ½ cup mini chocolate chips after removing from the heat.
- S’mores Style: Mix in crushed graham crackers and chocolate chunks.
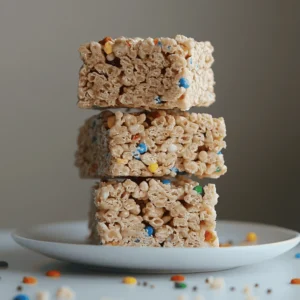
- Birthday Cake: Stir in a few tablespoons of rainbow sprinkles and a dash of almond extract.
Texture Add-ins
- Crushed pretzels
- Toffee bits
- Shredded coconut
- Chopped nuts (almonds, walnuts, pecans)
Colorful & Fun Ideas
- Use colored marshmallows or add a few drops of food coloring for themed holidays.
- Press into cookie cutters for heart, star, or Christmas tree shapes.
- Add a fun twist for the holidays, stick on some candy eyeballs for Halloween spookiness, or sprinkle red and green M&Ms for a cheerful Christmas vibe.
How to Store & Keep Rice Krispie Treats Fresh
You just made a batch (or two), and now you’re wondering—how do you keep them at peak deliciousness?
Room Temperature Storage
- Store them in an airtight container to keep them soft and chewy, no one wants a dry Rice Krispie treat!
- If stacking, place wax paper or parchment between layers.
They’ll stay perfectly fresh on the counter for about 3 to 4 days, if they last that long!
Refrigeration (Only If Needed)
- Not recommended unless your home is extremely warm.
- If you do refrigerate, let them sit at room temperature for 10–15 minutes before serving.
Freezing Instructions
Want to make ahead? You absolutely can.
- Slice them into squares, then wrap each one snugly in plastic wrap to keep them fresh and ready to grab anytime.
- Pop them into a freezer-safe bag, press out the air, and seal it tight to keep them fresh for later.
- Freeze for up to 6 weeks.
- Thaw at room temperature before eating. No reheating needed.
When & Where to Serve These Treats
This dessert is more than just a last-minute sugar fix, it’s surprisingly versatile.
Perfect for These Occasions:
- School Lunchboxes: Nut-free and kid-approved.
- Birthday Parties: Use themed sprinkles or cutters.
- Potlucks & Picnics: No refrigeration needed.
- Bake Sales: Wrap individually with cute labels.
- Holiday Gift Trays: Easy to personalize and stack.
Let Kids Help Out
- Stirring the cereal (with adult supervision)
- Pressing the mix into pans
- Adding toppings and sprinkles
- Using cookie cutters for shapes
Making these treats together is a fun kitchen bonding moment, and it teaches young ones how rewarding homemade snacks can be.
Conclusion – The Joy of Simple Sweetness
You’ve just discovered that making a Rice krispie treat recipe isn’t just about combining cereal and marshmallows, it’s about reliving joyful moments, creating new ones, and sharing smiles through something irresistibly simple.
This dessert proves you don’t need fancy techniques or expensive ingredients to create something wonderful. With a few pantry staples and a bit of love, you’re bringing back the joy of homemade sweets—one chewy bite at a time.
👉 Try this recipe tonight and tag us @QuickyCook on social media and follow us on Facebook. We’d love to see how your halibut turns out!
Frequently Asked Questions (FAQ)
What is the rice krispie treat recipe?
The classic Rice Krispie treat recipe calls for three basic ingredients: butter, mini marshmallows, and crispy rice cereal. You simply melt the butter and marshmallows together, stir in the cereal, and press the mixture into a pan. Let it cool, and you’ve got a chewy, crunchy dessert everyone loves.
How to make Rice Krispie treats with 3 ingredients?
You only need butter, mini marshmallows, and Rice Krispies cereal to make a 3-ingredient version.
Here’s how:
Melt ¼ cup butter over low heat.
Add a 10-oz bag of mini marshmallows and stir until melted.
Remove from heat and mix in 6 cups of Rice Krispies.
Press into a greased pan, let cool, and slice into squares.
It’s fast, easy, and perfect for beginners.
What can I make with Rice Krispies easily?
Besides the classic Rice krispie treat recipe, you can try:
Peanut butter krispie balls
Chocolate-covered Rice krispie squares
Rice Krispie nests for Easter
Marshmallow cereal bars with add-ins like sprinkles or M&Ms
These all use minimal ingredients and don’t require baking—perfect for quick treats.
Can I use regular marshmallows to make Rice Krispies?
Yes, you can use regular (large) marshmallows instead of minis. Just measure by weight (10 oz total), or use about 40 large marshmallows. Make sure to melt them slowly over low heat for the best texture in your Rice Krispie treat recipe.